Table of Contents
1. Introduction
This tutorial will walk through the steps for using Symplr to transform any Figma-based design into a functional mobile app with workflows, navigation, decisions, and backend integrations.
To demonstrate the process, we use a Neobank Symplr Figma Template as an example. You can follow the exact same steps with any other design of your choice.
By the end of this document, you will clearly understand how to import a Figma file, connect workflows, test your app, and finally download the production ready source code using Symplr’s visual workbench – Symplr Studio. No coding required, just a smooth, step-by-step experience from canvas to code.
2. Why Build with Symplr?
- No coding required: Anyone can build a complete app using a simple visual interface.
- Build in minutes: Go from Figma design to a working app in just a few simple clicks.
- Download and customize: Export clean, production ready code that developers can enhance or deploy right away.
Let’s get started.
3. Import Your Figma App Design into Symplr
The first step is to import your Figma design into Symplr. In this guide, we use a sample Symplr Figma Template as an example. It already includes many of the typical screens you would expect in a banking app, such as a LoginScreen and an accounts dashboard, so you don’t have to design everything from scratch. Let’s walk through the import process step by step.
3.1 Copy your Figma file link
Open the Neobank Symplr Figma Template design using the template link provided below: https://www.figma.com/community/file/1487337490258948080.
Once the file is open, click the Share button at the top right and copy the file link. Make sure the access setting is set to Anyone with the link can view this allows Symplr to read the design during the import process.
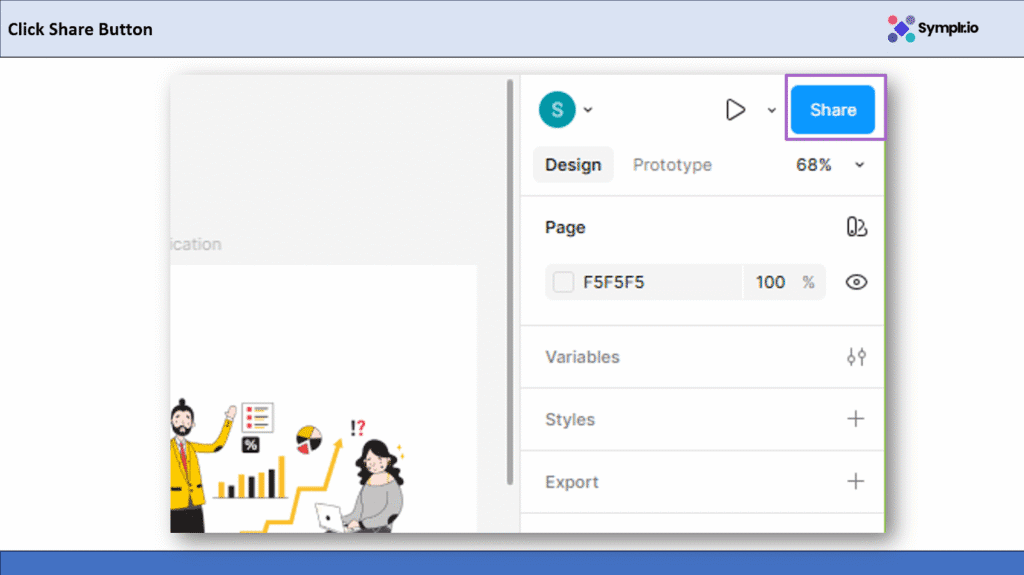
Figure 1 – Click Share Button
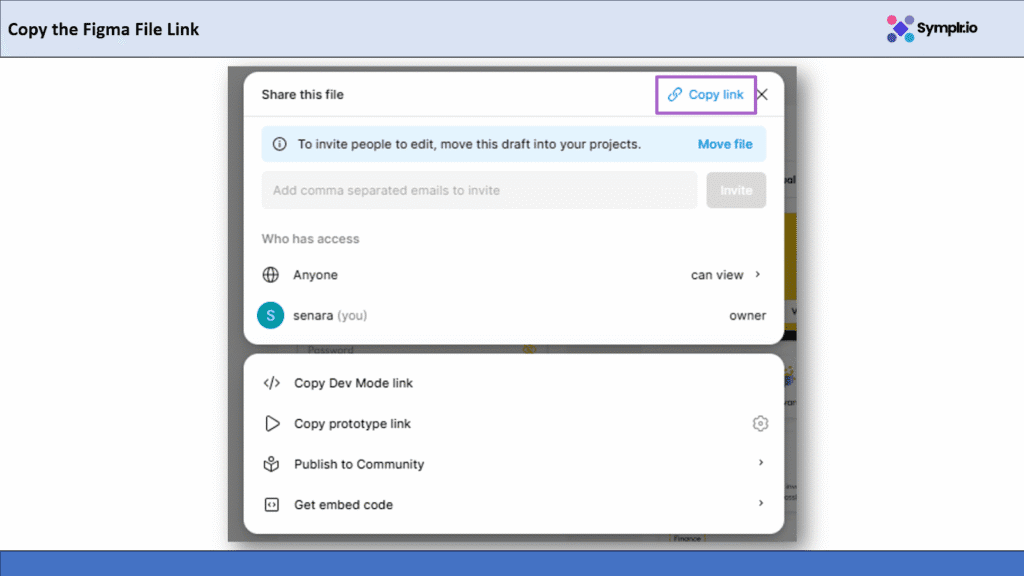
Figure 2 – Copy the Figma File Link
3.2 Paste the link in Symplr
Now head over to Symplr.io and click Import from Figma.
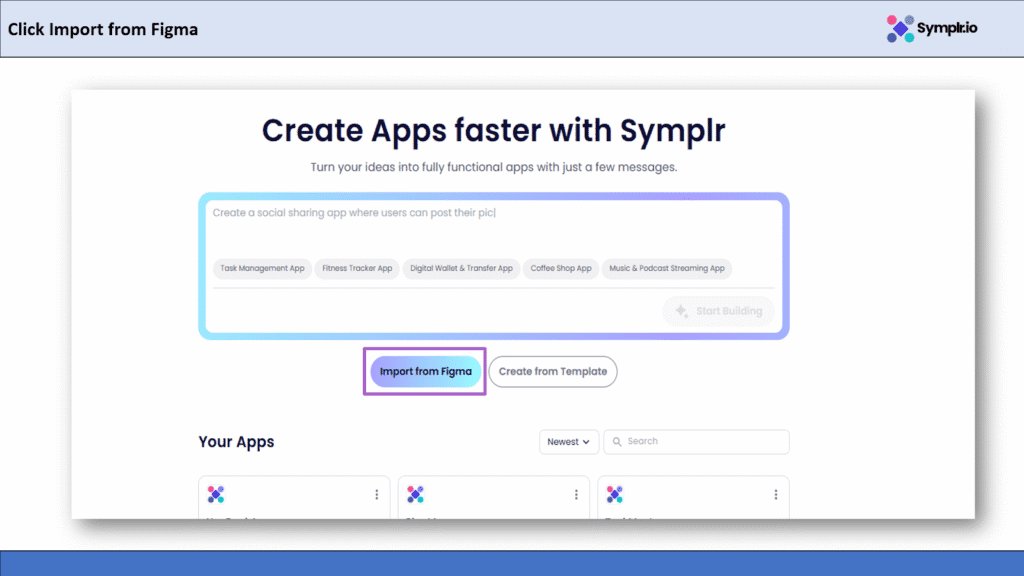
Figure 3 – Click Import from Figma Button
Then, paste the link you copied and click Continue. Symplr will automatically start reading your Figma design and begin importing it.
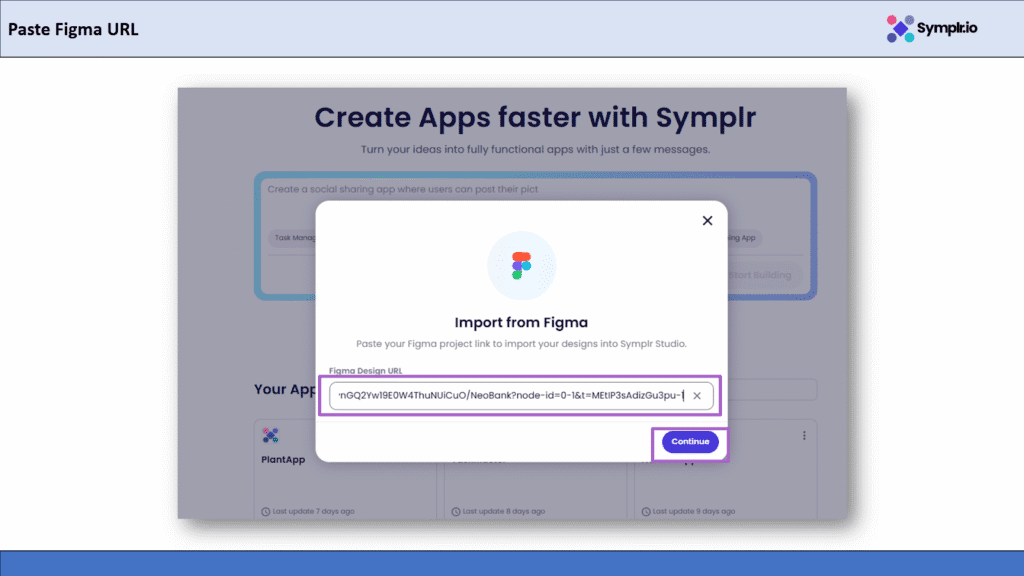
Figure 4 – Paste the Figma File Link and Continue
3.3 Name your app
Next, give your app a name, something simple like NeoBankApp. Once you enter the name, click Continue to proceed. This step simply sets the app name before generating your App in Symplr.
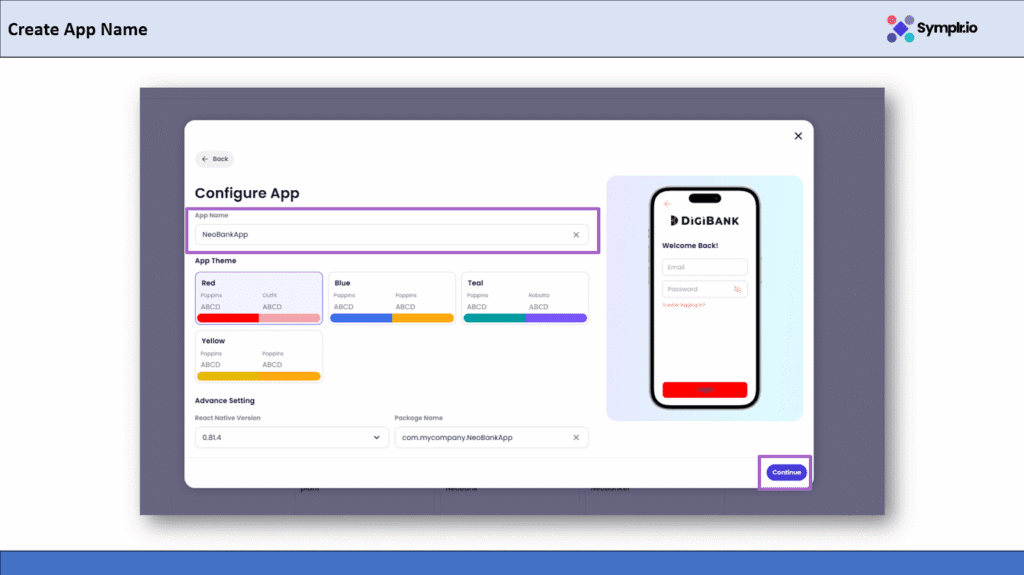
Figure 5 – Set App Name
3.4 Complete the Import
That’s it! Symplr will do its magic now, importing each screen: You should see a loading message.
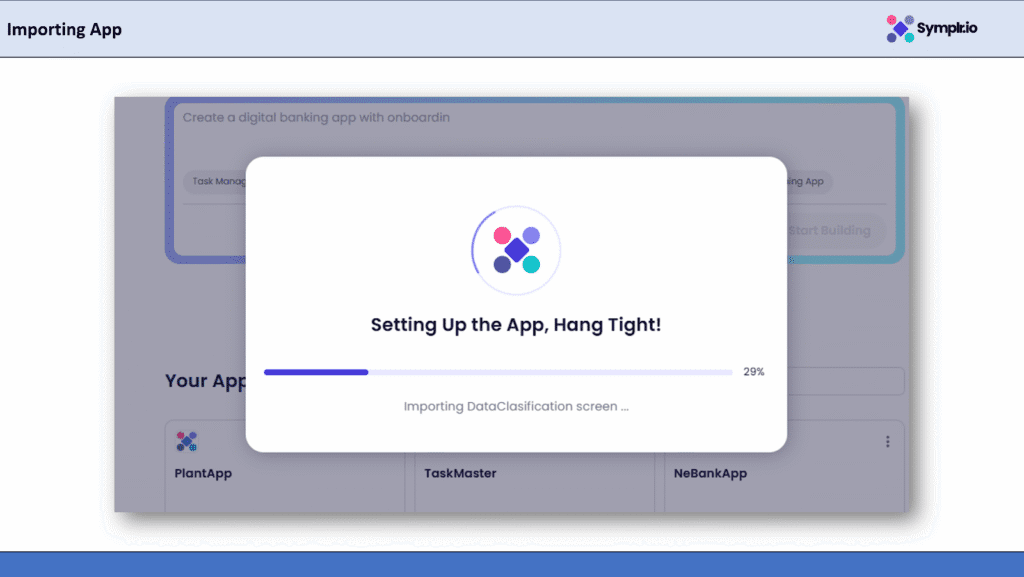
Figure 6 – Importing App
3.5 Check your imported app
After the import is complete, you will see your Figma design appear inside the Storyboard view in Symplr. All the screens will be displayed and connected in a flow, just as they were arranged in your Figma file.
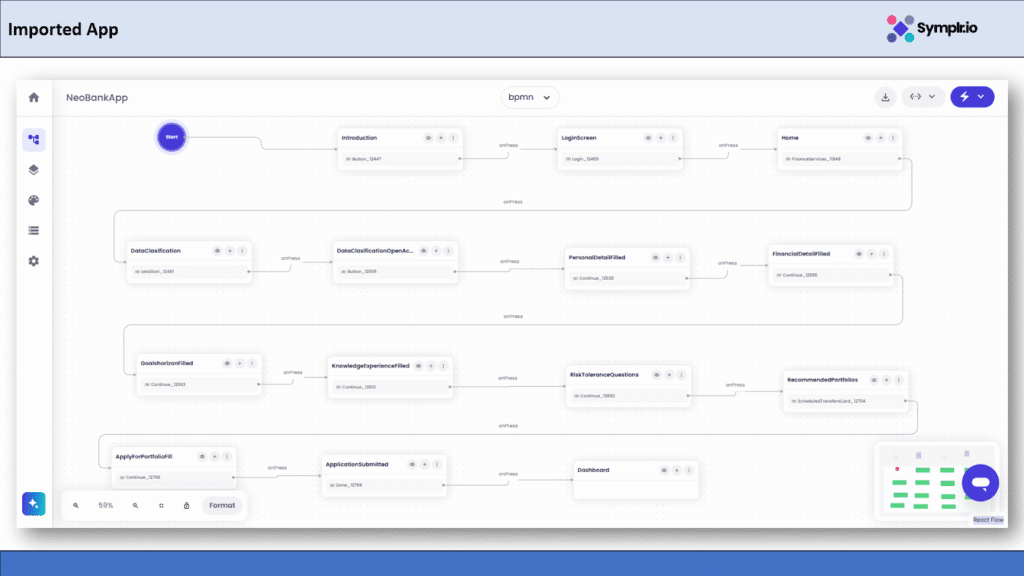
Figure 7 – Imported App
4. Connect the Login Workflow
Now that your app design is imported, it’s time to make the login button actually work; we’ll connect it to the Login Workflow so that when a user presses the button, the app verifies his or her login details.
4.1 Click the Add Button
Click the small + icon next to the LoginScreen in the storyboard. This opens the Add to Storyboard dialog, where you can add a workflow or screen.

Figure 8 – Click Add Button
4.2 Choose Workflow from the Menu
In the pop-up, select the Workflow option so you can connect your LoginScreen to a workflow.
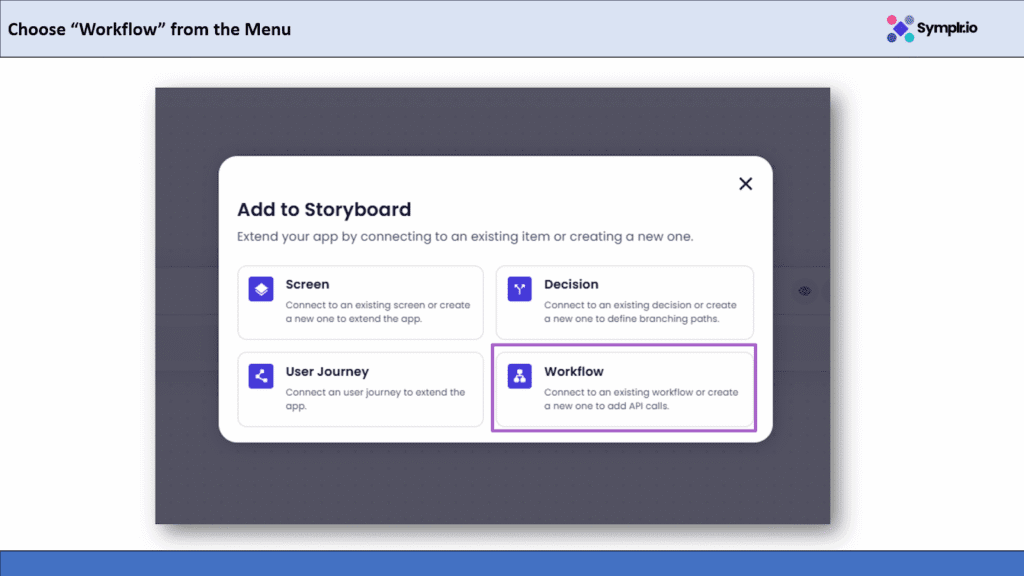
Figure 9 – Choose Workflow from the Menu
4.3 Select the Login User Workflow
A list of available workflows will appear. Find and select login-user-wf which handles authentication using email and password.
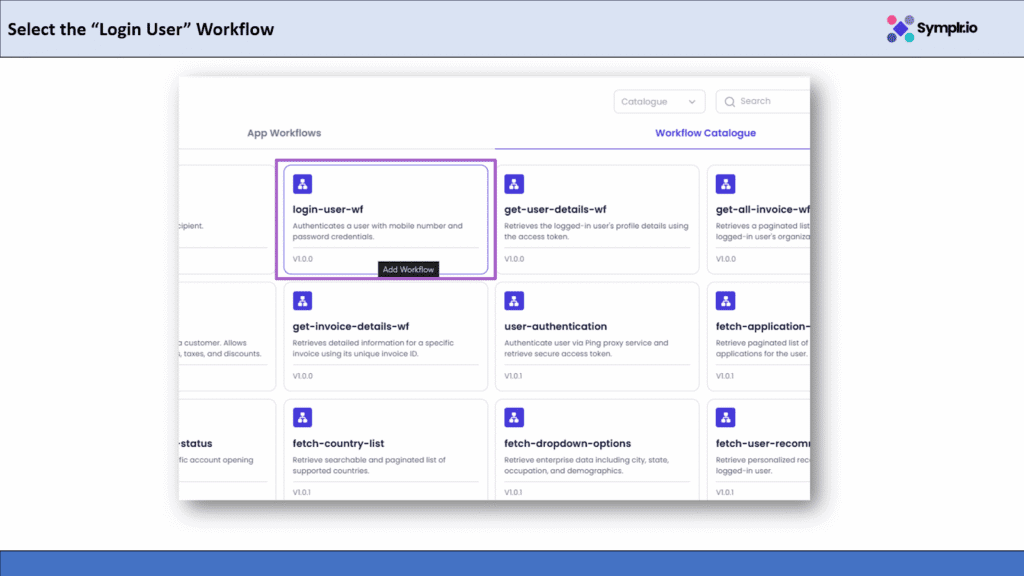
Figure 10 – Select the Login User Workflow
4.4 Enter Workflow Name and Description
Name it Login, and add a short description, for instance, Handles user login and authentication. Then click Continue.
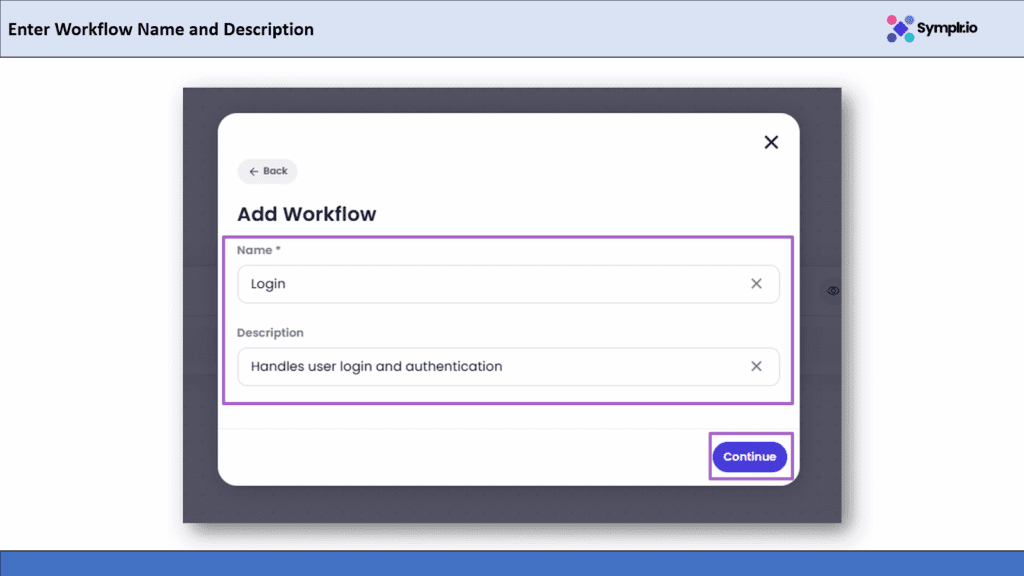
Figure 11 – Enter Workflow Name and Description
4.5 Choose Trigger Type onPress
Define what event should trigger this flow. Choose Event (onPress) and Widget (Login Button). Click Continue. This flow will now be triggered once the user taps the login button
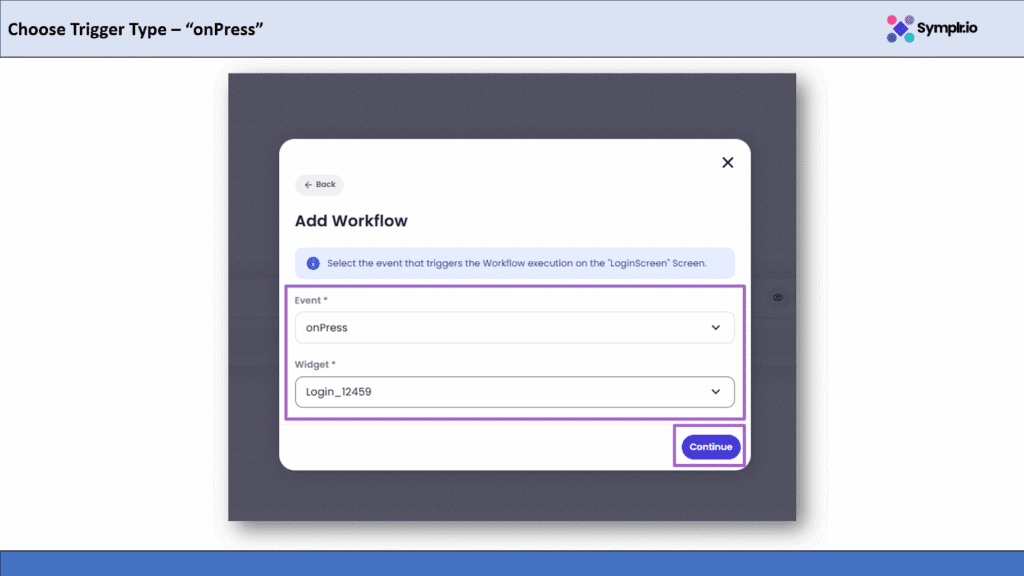
Figure 12 – Choose Trigger Type onPress
4.6 Login Workflow Successfully Connected
You will now see the new Login workflow connected with your LoginScreen. That’s it your app can now automatically handle user logins.
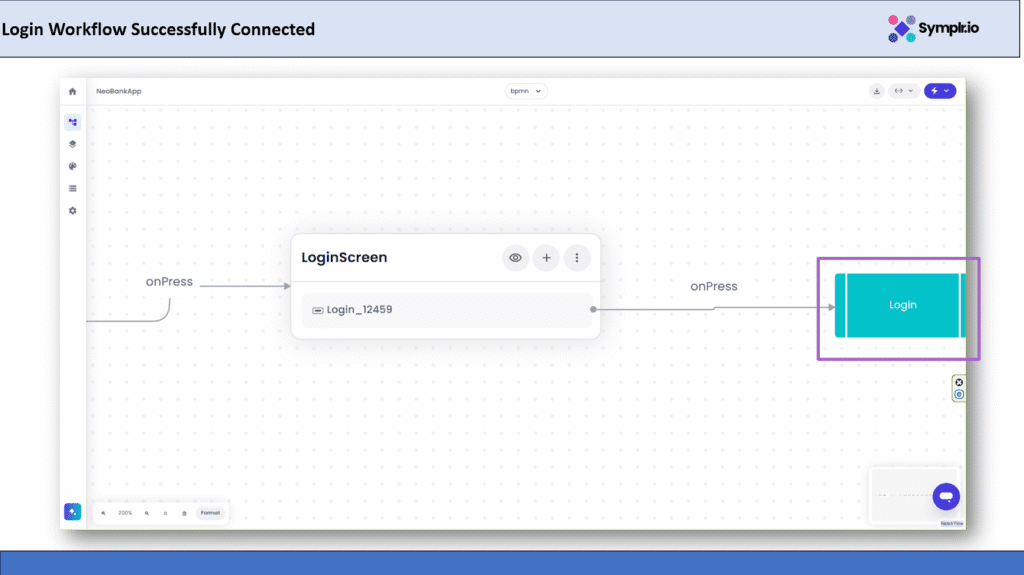
Figure 13 – Login Workflow Successfully Connected
5. Add the isAuthenticated Decision
Now we have connected the flow for the login. The next step is to check whether the login was successful or not. We’ll add a Decision Node (a point where the workflow branches based on a condition) called isAuthenticated, which will decide what happens further for example, whether the user goes to the Dashboard or sees the error message.
5.1 Click the Add Button
Click the + icon under the Login workflow node to add a new step.
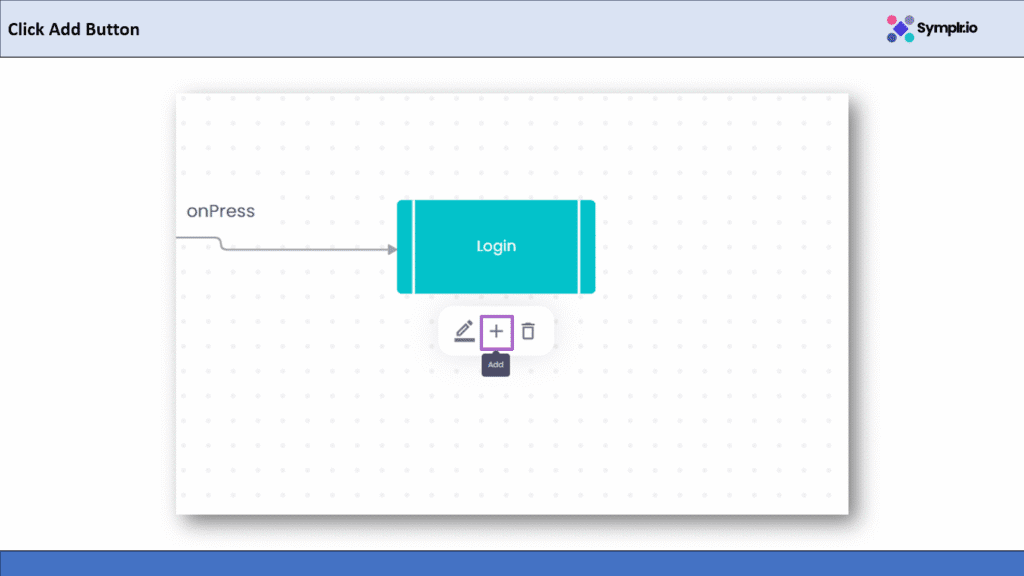
Figure 14 – Click Add Button
5.2 Choose Decision from the Menu
From the pop up options, select Decision. This allows you to create a branching path based on the workflow result.
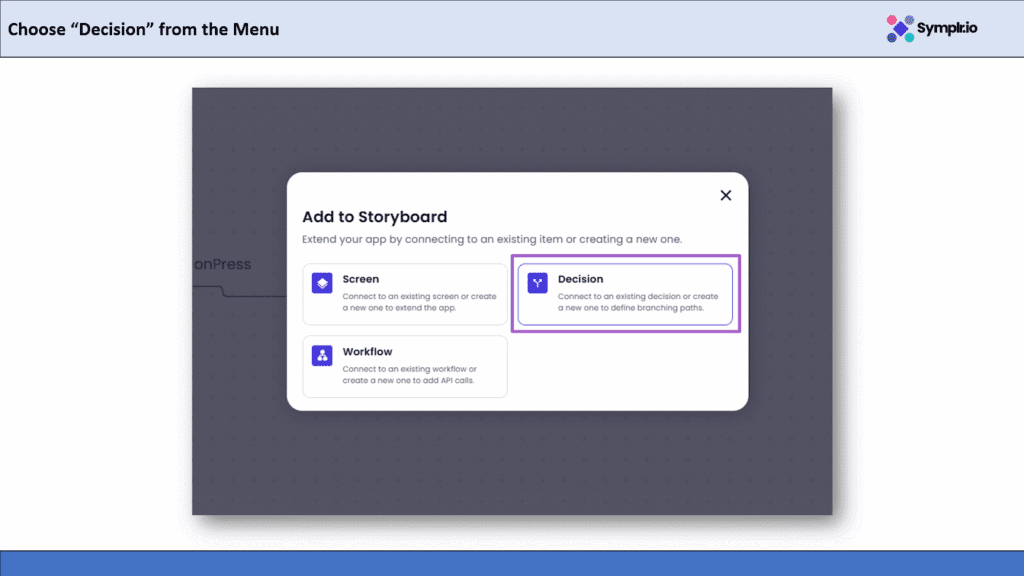
Figure 15 – Choose Decision from the Menu
5.3 Add New Decision
Click Add New Decision to create a custom decision node.
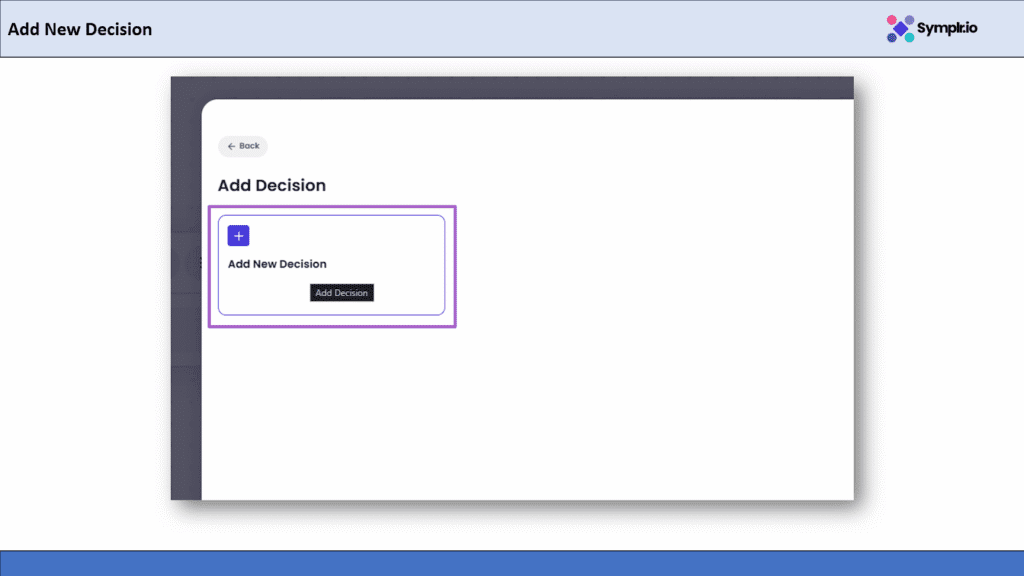
Figure 16 – Add New Decision
5.4 Add Decision Name
Give a clear name to your decision like isAuthenticated so it is easy to identify within the workflow.
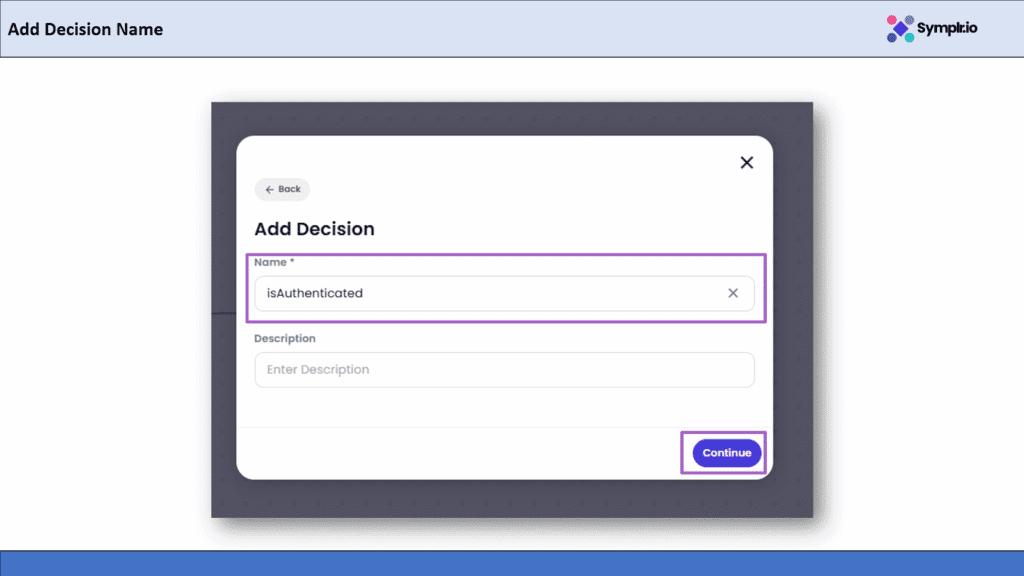
Figure 17 – Add Decision Name
5.5 Select Event
Select Event → onSuccess, then click Continue. This ensures the decision runs only when the login workflow is successful.
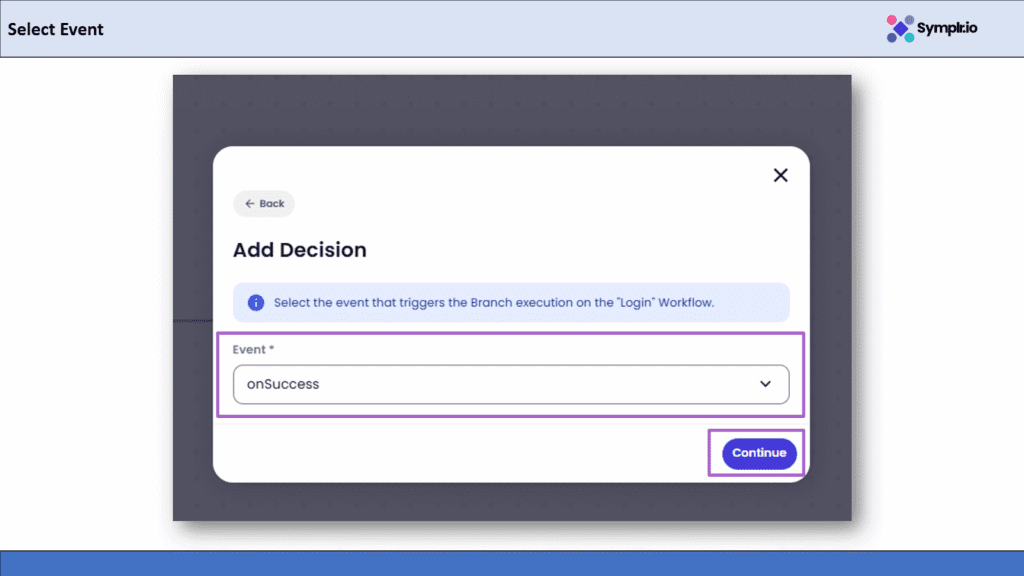
Figure 18– Select Event
5.6 isAuthenticated Decision Successfully Connected
Once added, you’ll see the isAuthenticated decision node connected to your Login workflow. This confirms the app can now decide what to do next based on the login result.
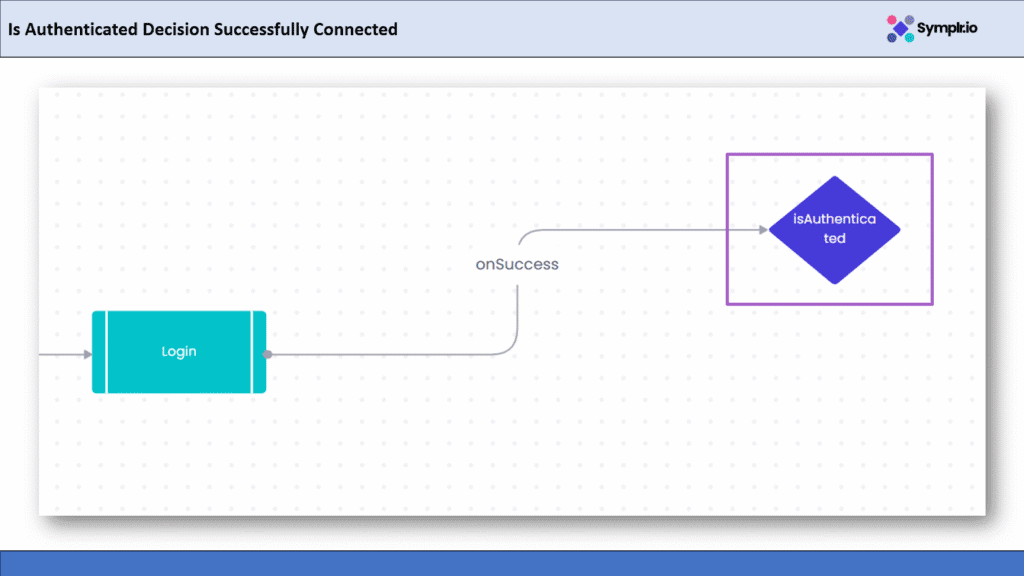
Figure 19 – isAuthenticated Decision Successfully Connected
6. Connect the GetAccounts Workflow
Having verified that the user isAuthenticated, the next thing is to fetch his account details. We shall now hook up the GetAccounts workflow to retrieve the customer’s list of accounts from the backend.
6.1 Click the Add Button
Click the + icon below the isAuthenticated decision node to add a new action.

Figure 20 – Click Add Button
6.2 Choose Workflow from the Menu
In the pop-up, select Workflow. This tells Symplr to connect to an API based workflow.
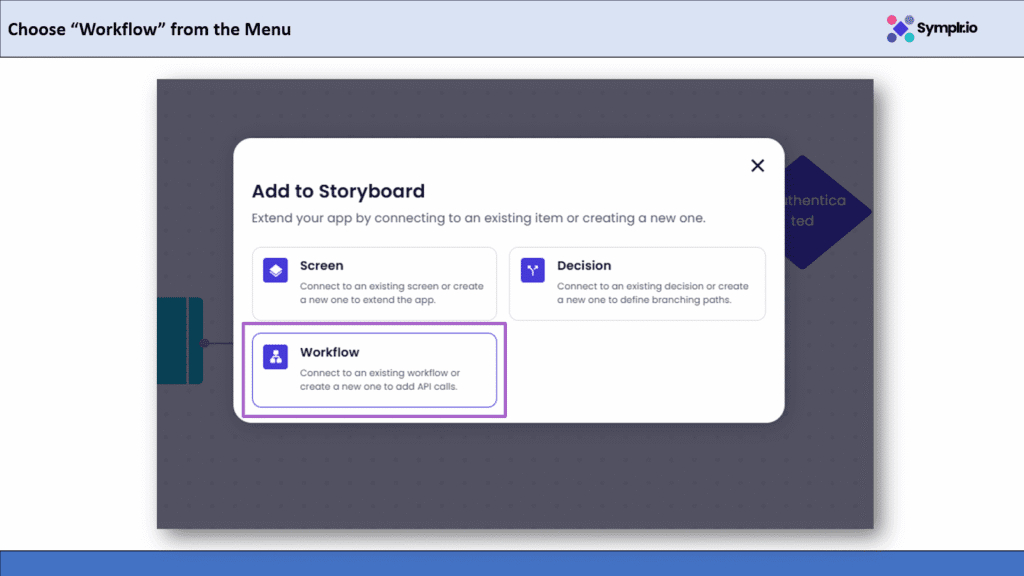
Figure 21 – Choose Workflow option
6.3 Select the Workflow
From the workflow list, choose fetch-wallet-list this workflow retrieves the list of accounts or wallets for the logged-in user and will be displayed as GetAccounts in the storyboard.
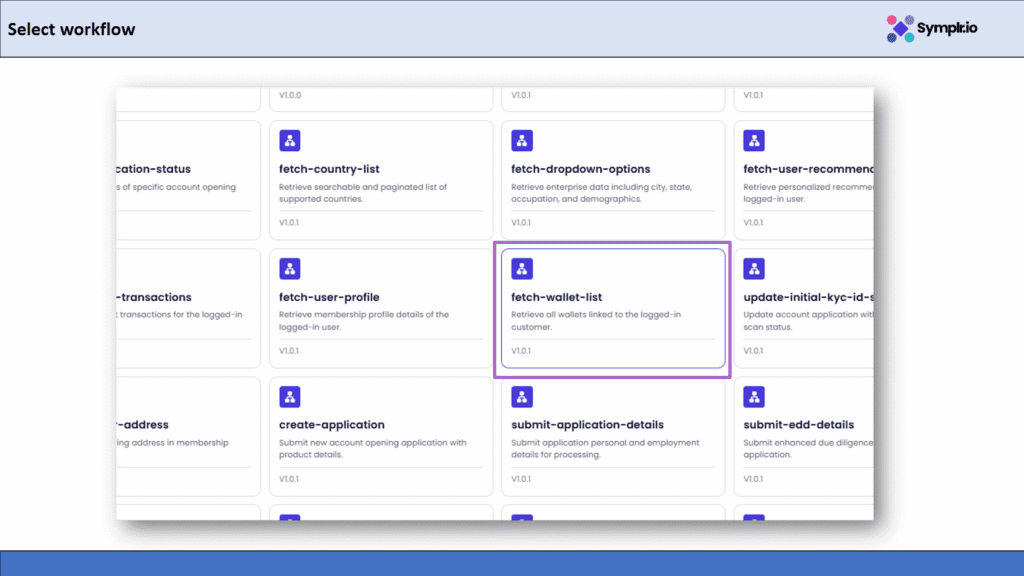
Figure 22 – Select Workflow
6.4 Add Name for Workflow
Enter a name, such as GetAccounts, optionally followed by a description such as Retrieve account details for authenticated users. Click Continue.

Figure 23 – Add Name for Workflow
6.5 Enter Expression
Next, click the + icon again, add a condition expression, for example #exists(${login.accessToken}) . That just checks whether the user has logged in successfully. When the Login workflow runs, it returns an accessToken, this is a special code the system gives you when your email and password are correct. Symplr automatically stores this token in the Login workflow output. By using #exists(${login.accessToken}), we are telling Symplr Only proceed to the next workflow if a successful login has been achieved and a token is received. In case the user entered the wrong login credentials, no token will be generated. That way, it keeps the flow safe, and the next API will not run without proper authentication.
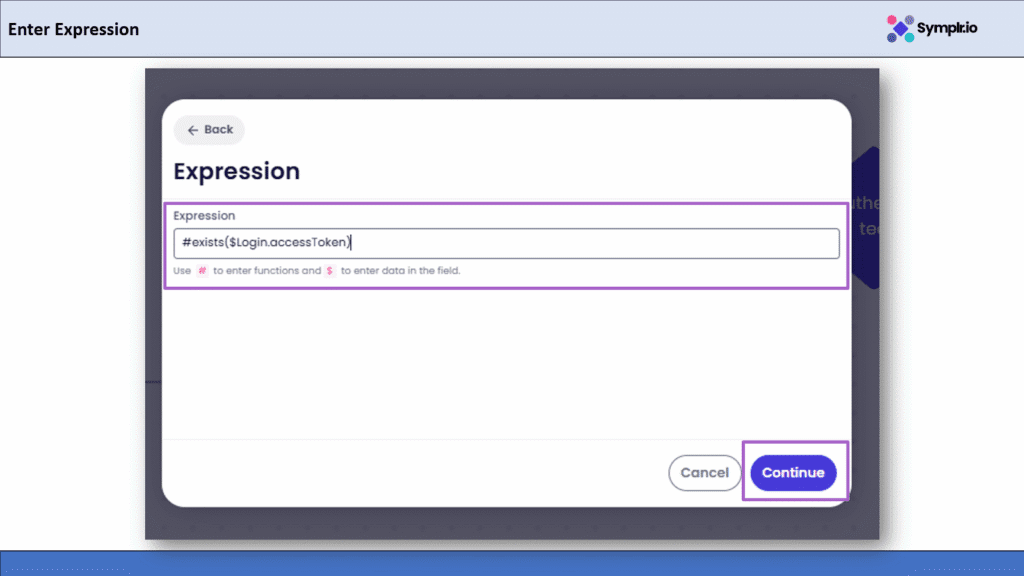
Figure 24 – Enter Expression
6.6 Data Mapping
Map the accessToken from the Login workflow output to the GetAccounts workflow input. This token comes from the Login workflow and confirms that the user is logged in. By mapping ${login.accessToken}, Symplr can use the user’s authenticated token to fetch account data securely.
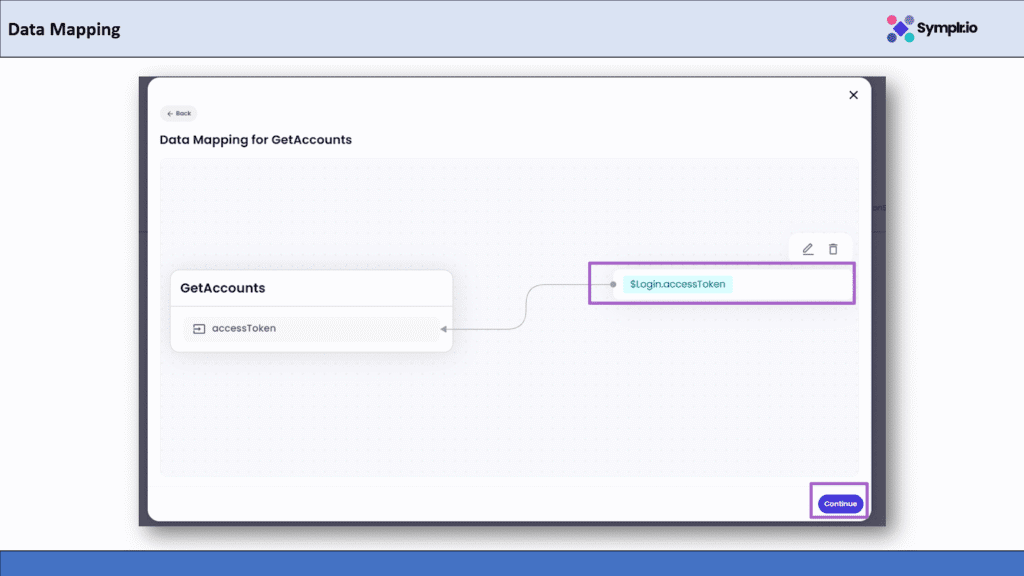
Figure 25 – Data Mapping
6.7 Get Accounts Workflow Successfully Connected
Once done, you’ll see that the workflow node GetAccounts is now connected to the isAuthenticated decision. This confirms it is complete. Your flow now logs in a user and fetches their account information automatically.
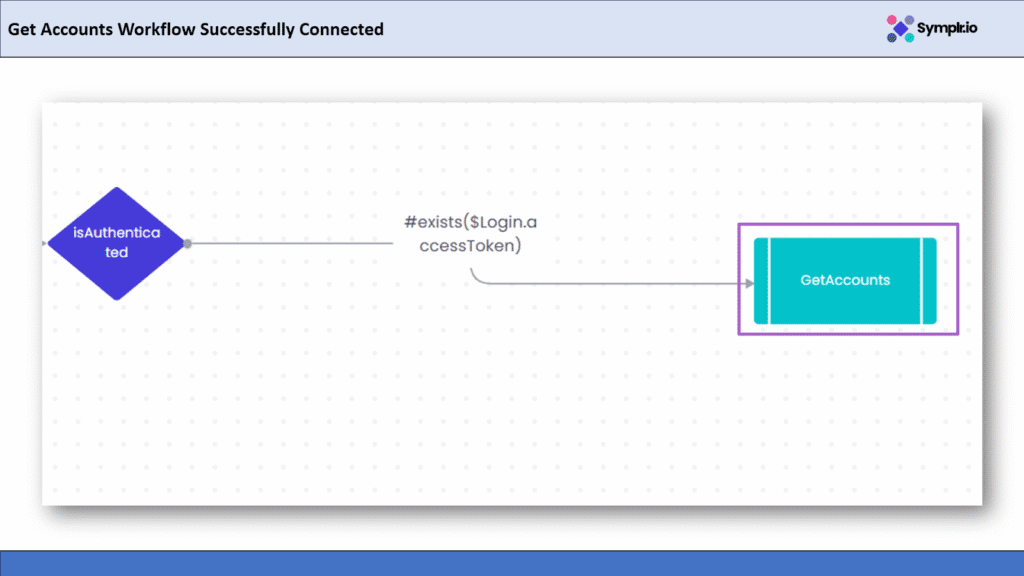
Figure 26 – GetAccounts Workflow Successfully Connected
7. Add the hasAccounts Decision
Now, after the system retrieves the accounts of the user, we need to check if the customer already has an active account. In this regard, we will add a Decision Node called hasAccounts that decides whether to display the list of accounts or have the user create a new one.
7.1 Click the Add Button
Click the + icon below the GetAccounts workflow to add the next step in the process.
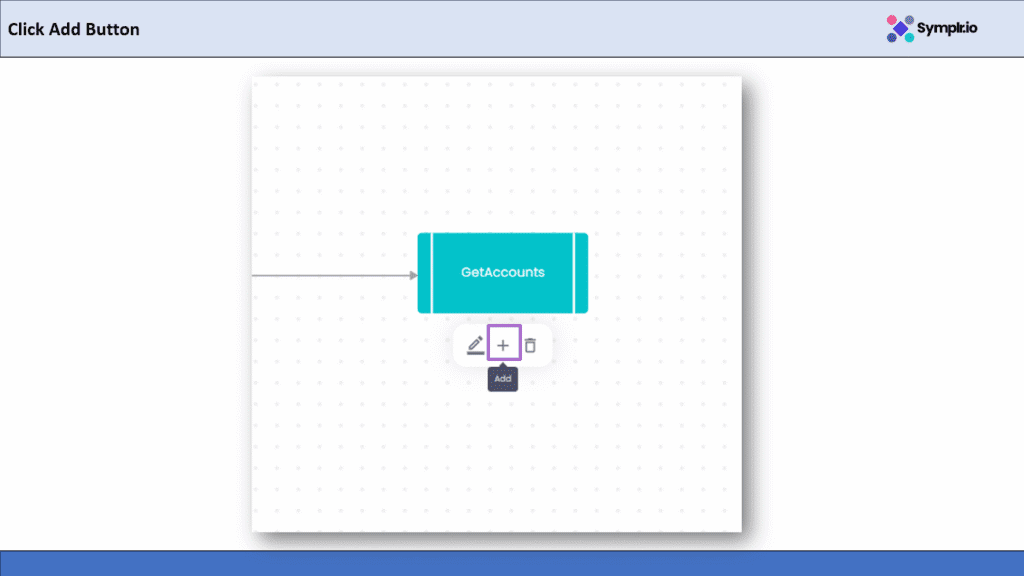
Figure 27 – Click Add Button
7.2 Choose Decision from the Menu
In the pop up menu, select Decision. This enables you to define a branching logic based on whether accounts exist.

Figure 28 – Choose Decision from the Menu
7.3 Add New Decision
Click Add New Decision. This will open a window to create a new decision node.

Figure 29 – Add New Decision
7.4 Enter Decision Name
Name the decision hasAccounts, so it’s easy to understand the condition being checked. Then click Continue.

Figure 30 – Enter Decision Name
7.5 Select onSuccess
Choose the event onSuccess from the dropdown. This will ensure that the hasAccounts decision runs only when the GetAccounts workflow successfully retrieves data.
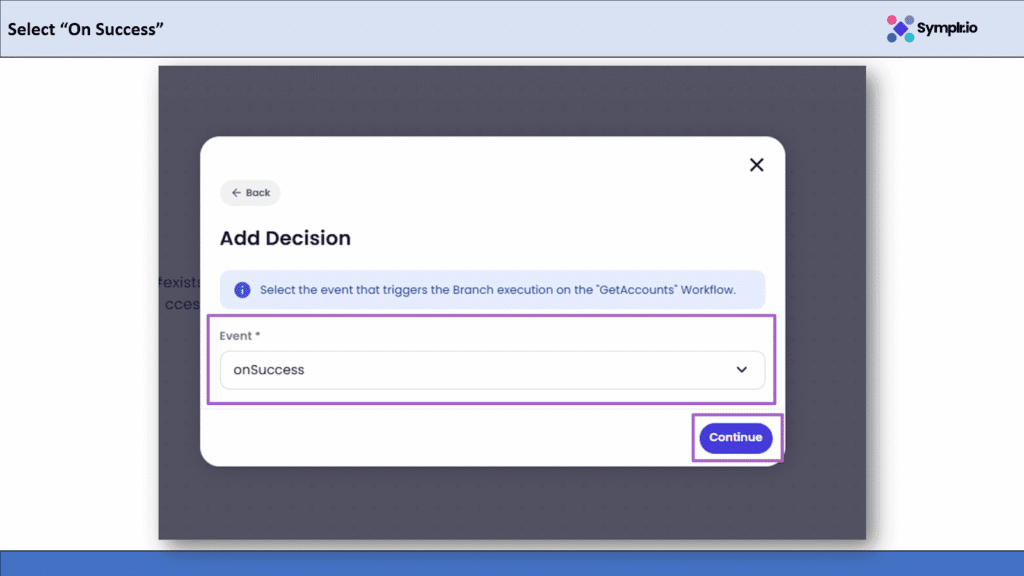
Figure 31– Select onSuccess
7.6 hasAccounts Decision Successfully Connected
Once connected, you will see the hasAccounts decision node after the GetAccounts workflow. Now the app will be able to decide based on whether the user account data exists or not.

Figure 32– hasAccounts Decision Successfully Connected
8. Add Home Screen
Once the hasAccounts decision is created, we’ll link it to the Home Screen. This is the screen that will be presented to users who have an existing account once their login is successful.
8.1 Click the Add Button
Click the + icon below the hasAccounts decision node to add the next step.
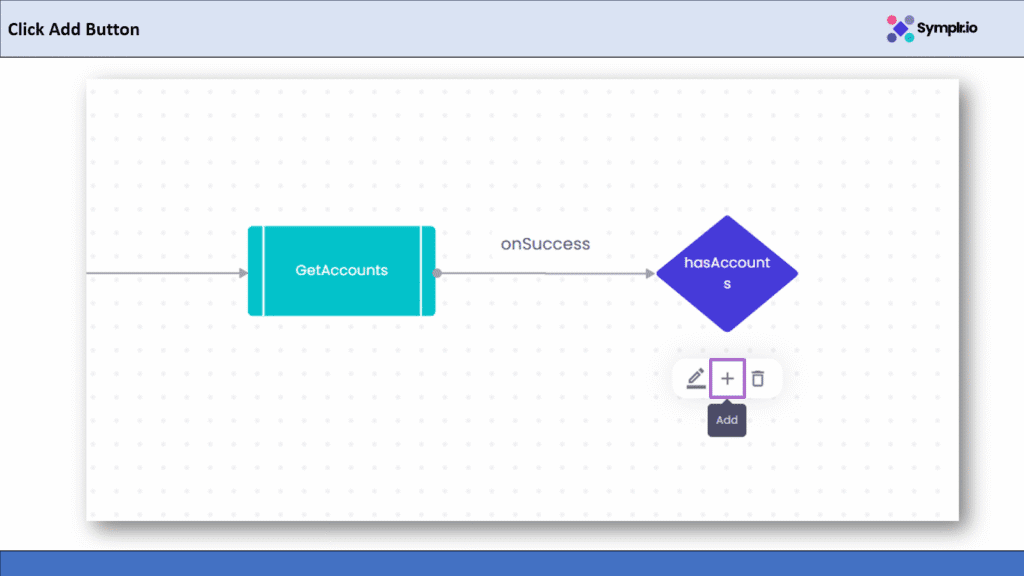
Figure 33 – Click Add Button
8.2 Choose Screen from the Menu
Click Screen from the menu. This will allow you to link a visual page such as Home, Dashboard, or Profile to your workflow.

Figure 34 – Choose Screen from the Menu
8.3 Select Home Screen
From the available list of app screens, select Home. This screen will display user information such as account summary, balance, and navigation options.
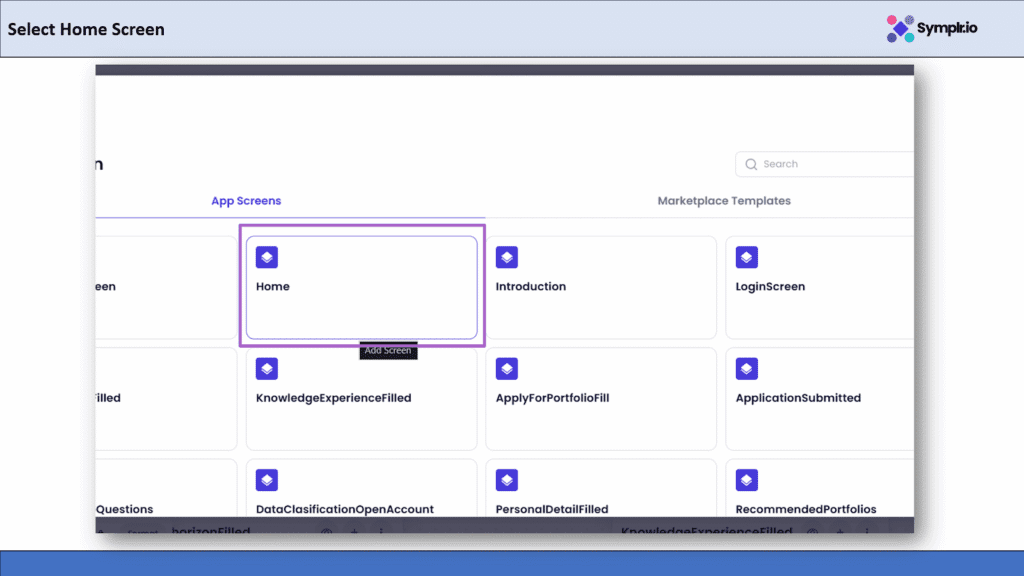
Figure 35– Select Home Screen
8.4 Add Expression
Enter the following condition in the Expression. This ensures that the Home screen only appears when a user’s account data exists.
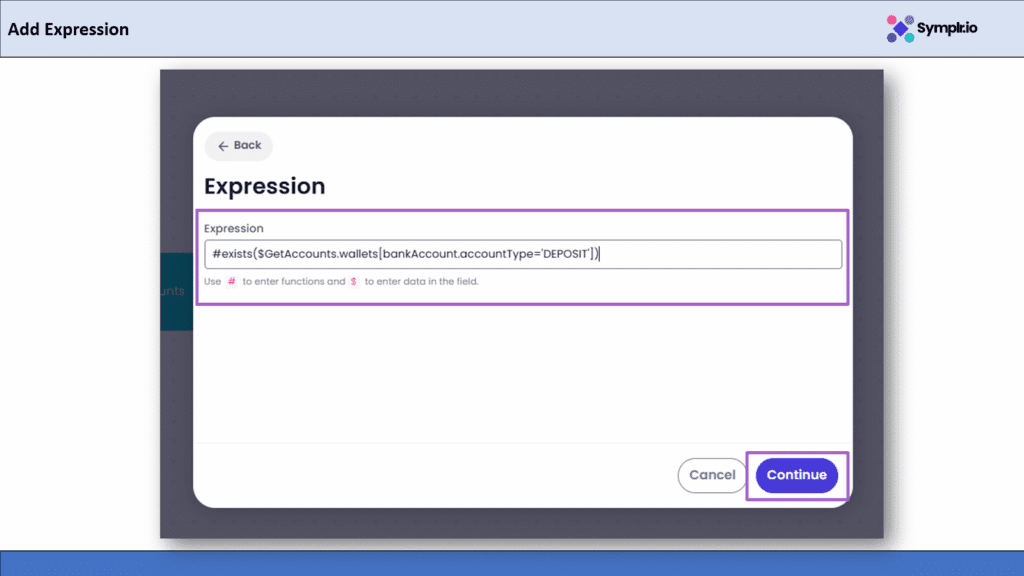
Figure 36– Add Expression
How to get this Expression
This expression is based on the returned information from the GetAccounts workflow. When the end-user logs in, GetAccounts brings back their account details. In the Expression box you can start typing # to pick a function, or ${ to see the data that comes from GetAccounts. This expression is used here to simply check whether any account data exists, and if it does, the user will be taken to the Home screen.
8.5 Home Screen Successfully Connected
Once all workflows and screens are connected, from Login to GetAccounts and Home, it’s time to build and test the full app.
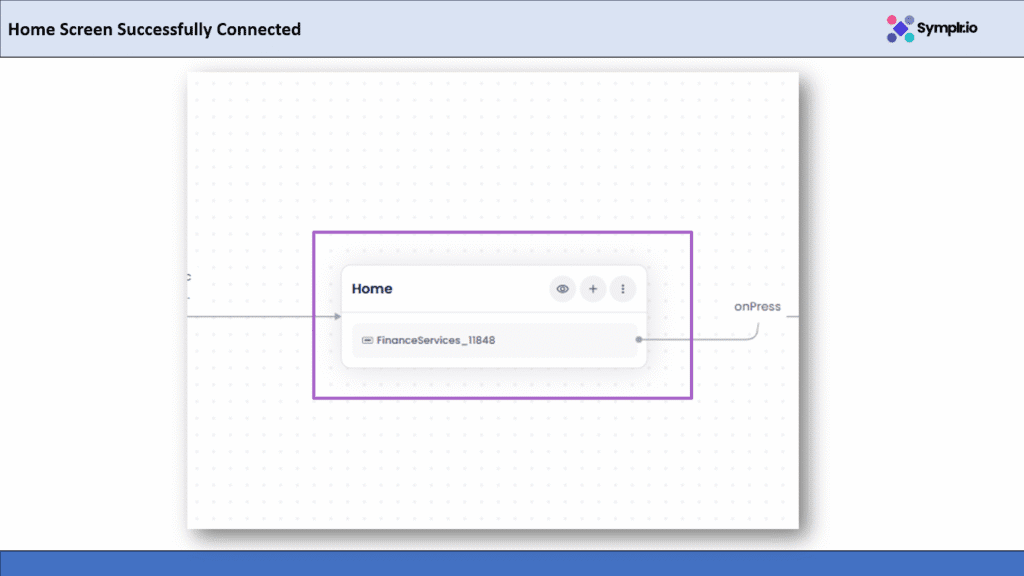
Figure 37 – Home Screen Successfully Connected
9. Build and Test the App
Once all workflows and screens are connected, from Login to GetAccounts and Home, it’s time to build and test the full app.
9.1 Click the Build Button
Click the Build & Run App button at the top-right corner of the storyboard view.

Figure 38– Click Build Button
9.2 Build Screens
Build Screens gives you an overview of all the screens that Symplr has generated automatically from your Figma design once the build process is completed. In one convenient place, you can review what each screen looks like to confirm that your design has been converted into real, functional application screens.
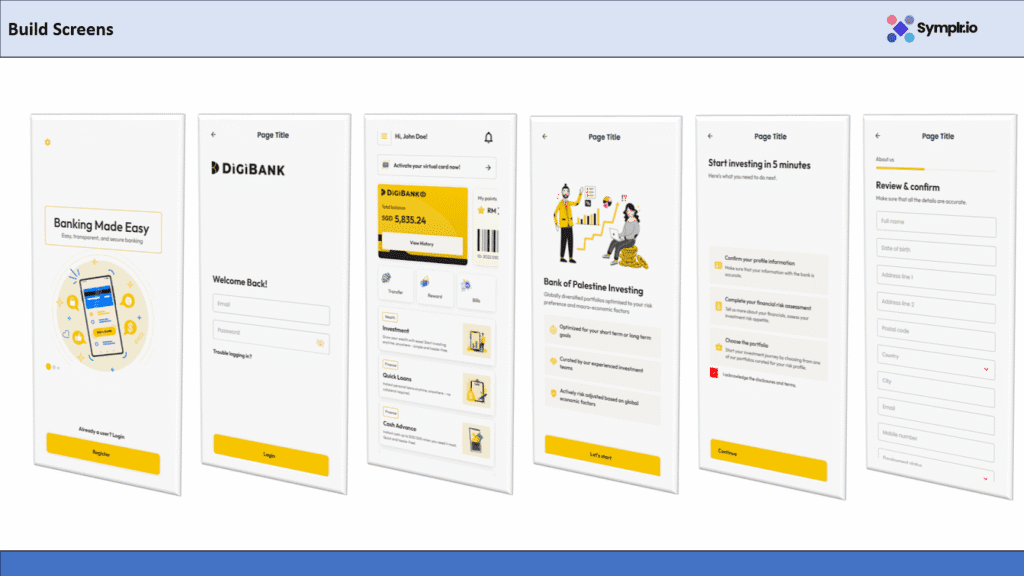
Figures 39.1 – Build Screens
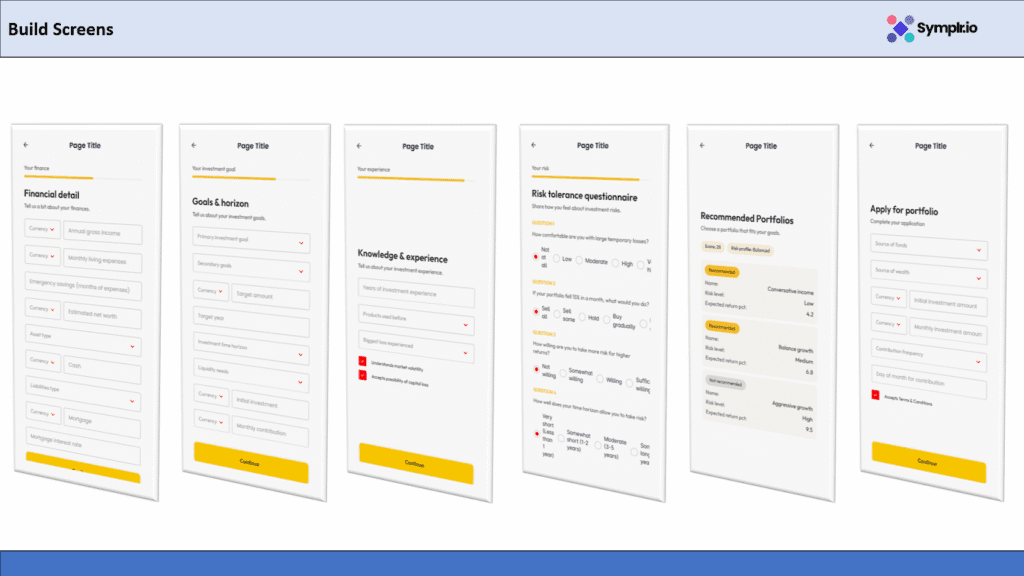
Figures 39.2 – Build Screens
Your Neobank app now lives in Symplr. You’re welcome to play around with all screens, check API connectivity, and make sure that the workflows-from Login → GetAccounts → hasAccounts → Home-work exactly how they’re supposed to.
10. Download the App Code
Download the App Code Once you have the workflow and screens connected and tested, you can export the full app code for further development or integration with your existing systems.
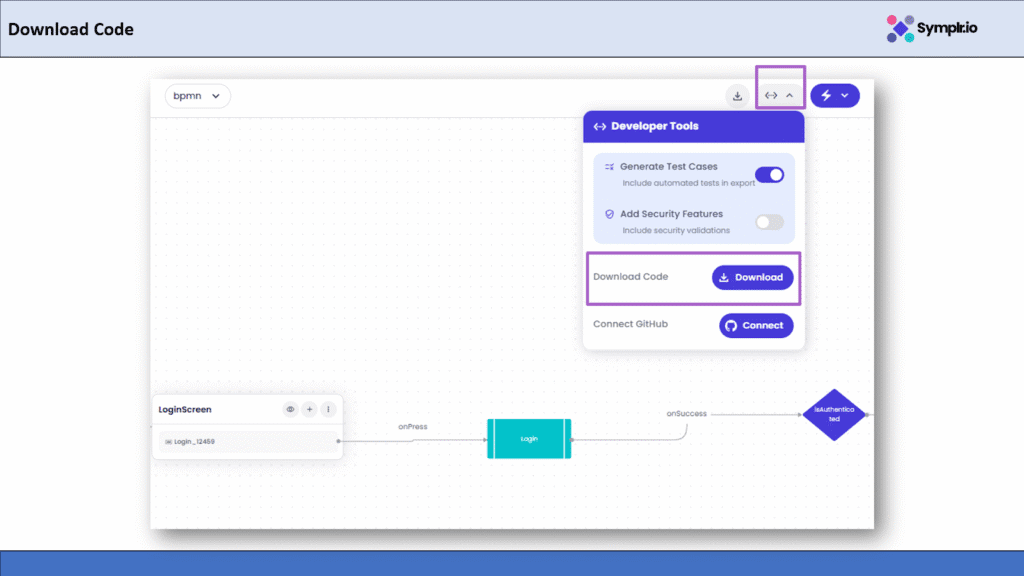
Figure 40– Download Code
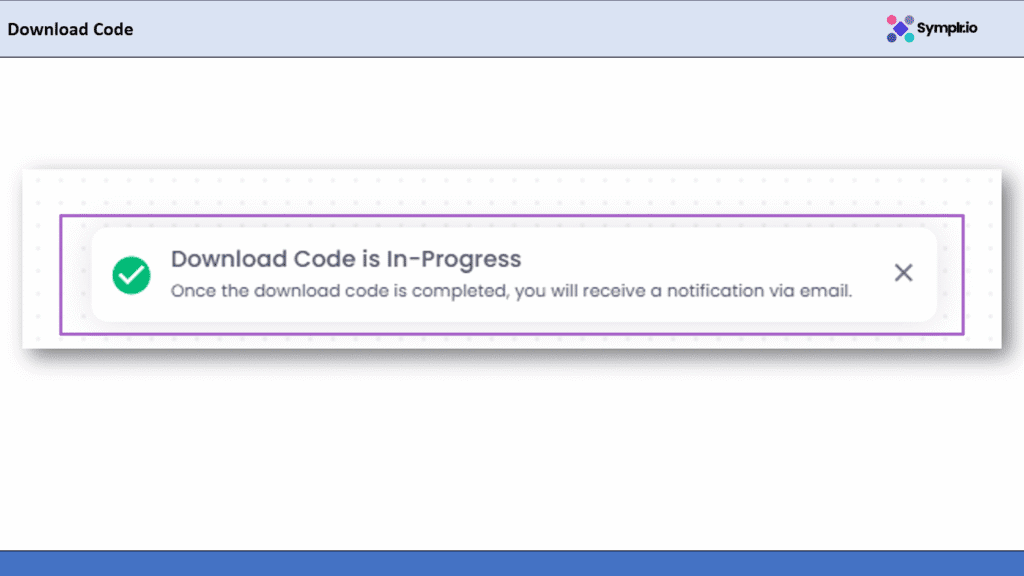
Figure 41 – Download Code in Progress
Once your app is built, Symplr automatically sends you an email letting you know your code is ready. Just open the message from Symplr Studio and click the Download Code button ,it’s that simple!
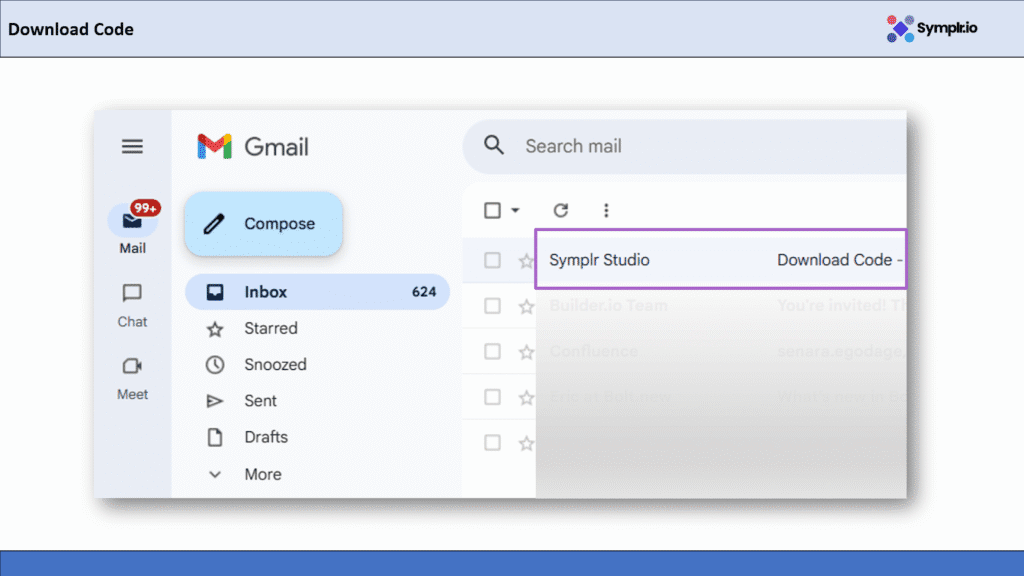
Figure 42.1– Download Code
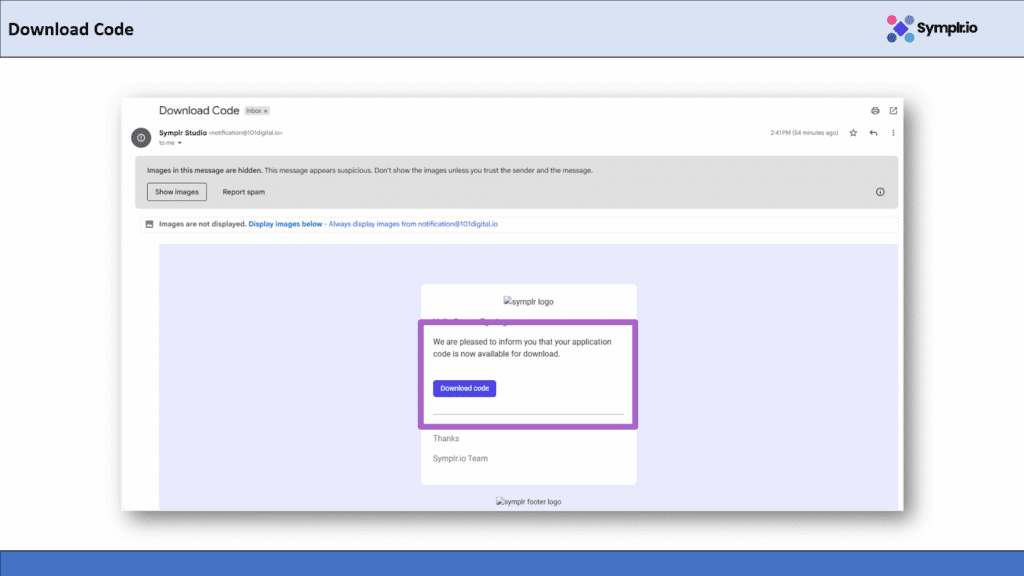
Figure 42.2– Download Code

Figure 43- Downloaded code
A few moments later, you’ll have a complete project folder ready to go. Open it in VS Code, and you’ll see all your app files neatly organized including the front-end screens, logic, and configuration.
From here, you can start customizing the app, add new features, or deploy it directly. Symplr makes it effortless to turn your visual design into real, production-ready code with no manual setup, no confusion, just clean code in a few clicks.
11. Conclusion
We successfully built a complete banking-style app using the Symplr Workflow Builder through this process, right from design to a working testable application.
We started with importing a Figma design and then connected APIs, workflows, and decision points one after the other. Then, visually, using Symplr’s intuitive drag-and-drop interface, everything from login and authentication through account retrieval to the display of a dashboard was configured.
Then, with the Build & Run App feature, we tested the full flow of the app, seeing that it works as it should. Finally, we used the Download Code option to export the full project in order for developers to enhance or deploy it further.
With Symplr, developers and non developers alike can more quickly and easily build end-to-end digital banking experiences without complex coding.
FAQs
How do I add a new Workflow (e.g., connect an API) to my app?
To add a workflow:
In the Storyboard view, click the small + icon next to the screen or workflow node you want to connect from.
In the pop-up menu, select the Workflow option.
Choose the desired workflow from the list (e.g., login-user-wf or fetch-wallet-list).
Give the workflow a descriptive name and click Continue.
If needed, define a trigger (like an Event onPress for a button) and map any necessary data inputs (like an accessToken) from a previous step to the new workflow.
How do I add a Decision or Condition to create branching logic in a workflow?
A Decision Node allows you to create a branching path in your workflow based on a condition, like whether a login was successful or if accounts exist.
Click the + icon below the workflow node where you want to add the check.
From the menu, select Decision, then click Add New Decision.
Give the decision a clear name (e.g., isAuthenticated or hasAccounts).
Select an event like onSuccess to ensure the decision runs only after the preceding workflow successfully retrieves data.
The app will then use this decision to determine the next screen or action
Is it possible to edit the app after importing it from Figma?
Yes! Once you import the Figma design into Symplr, you’ll have the capability to edit screens and adjust layouts while connecting your workflows any time. Changes show up instantly in your app.
What happens when I click Download Code?
When clicking Download Code, Symplr creates the entire source code. You will be able to open it in a tool such as VS Code to make customizations or deploy it onto your own server.
Do I need to write any code to build this app?
No coding is required! Symplr’s visual builder lets you design, connect APIs, and test everything using drag-and-drop components. However, developers can enhance the downloaded code if they want to add custom feature.